Remote Motor Control: Raspberry Pi and MQTT via Browser
So, you’ve got your motors up and running—great job! Now, the next step is to control them remotely.
In this article, we'll explore how to control the motors connected to your Raspberry Pi from a web browser using MQTT over WebSockets. This approach is ideal for IoT projects where you need to control devices in real-time from anywhere.
By the end of this tutorial, you'll have a system that allows you to control the motors with just a few clicks via the web.
Prerequisites
Before you begin, make sure you have the following:
- Hardware: Raspberry Pi with motors connected and tested.
- Software: An installed and updated Raspberry Pi OS.
- Libraries: Paho MQTT C++ client, WiringPi.
- Knowledge: Basic understanding of MQTT and WebSockets.
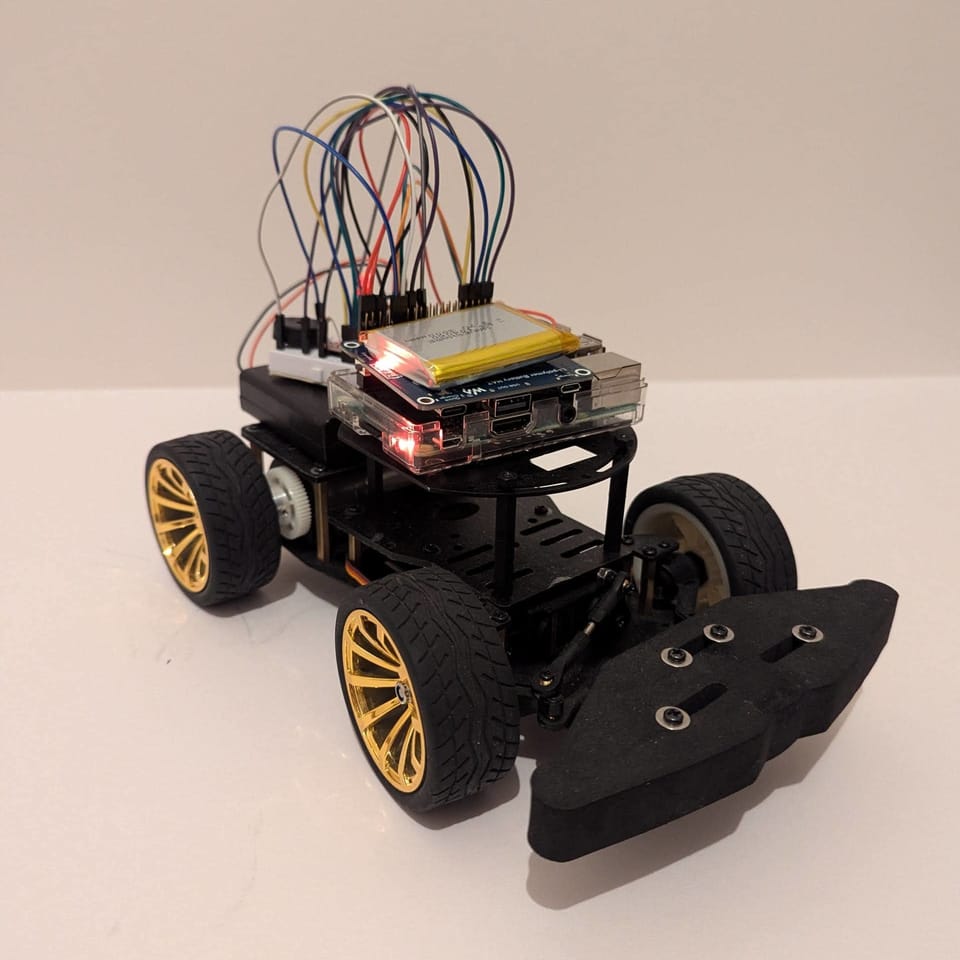
The circuit diagram and wiring are in the previous post. I used the LiPo Battery HAT for Raspberry Pi from Waveshare to make the car portable.
Note: For this example, we're using the test server at test.mosquitto.org. I encourage you to familiarise yourself with it before beginning.
Steps to Get Started
1. Update Raspberry Pi
Ensure your Raspberry Pi system and OS are up to date. For instructions, see the latest Raspberry Pi docs.
2. Install MQTT Client
You must install the Paho C++ MQTT client library on your Raspberry Pi.
You can clone and build it from the official GitHub repository. You don't need to worry about where you place it as long as you know where it is for future reference.
3. Write Code (Raspberry Pi)
Now, it's time to code. You can use the example code below or write your own. The key is to understand what each part of the code does.
A rough outline would be something like the below:
// Class to receive callbacks
class user_callback : public virtual mqtt::callback
{
	void connection_lost(const string& cause) override {
		cout << "\nConnection lost" << endl;
		if (!cause.empty())
			cout << "\tcause: " << cause << endl;
	}
public:
};

int main(int argc, char* argv[])
{
    // Initialize the WiringPi library for GPIO control
	wiringPiSetup();

	// Put code here to initialize motor(s) and other things

    // Create the MQTT client, connecting to the MQTT broker
	mqtt::client client(SERVER_ADDRESS, CLIENT_ID);

    // Set callback function to be notified if the connection is lost
	user_callback cb;
	client.set_callback(cb);

    // Set connection options
	auto connOpts = mqtt::connect_options_builder()
		.keep_alive_interval(seconds(30))
		.automatic_reconnect(seconds(2), seconds(30))
		.clean_session(false)
		.finalize();

    // Define topic and quality of service level
	const vector<string> TOPICS { "<MY_TOPIC>" };
	const vector<int> QOS { 1 };

	try {
		mqtt::connect_response rsp = client.connect(connOpts);

		if (!rsp.is_session_present()) {
			// Subscribe to topics for receiving motor control messages
			client.subscribe(TOPICS, QOS);
		}
		else {
			cout << "Session already present. Skipping subscribe." << endl;
		}

		// Consume messages
		string msgCommand = "";

		while (true) {
			auto msg = client.consume_message();
			msgCommand = "";
			if (msg) {
				if (msg->get_topic() == "<MY_TOPIC>") {
					if (msg->to_string() == "exit") {
						cout << "Exit command received" << endl;
						break;
					}
					msgCommand = msg->to_string();
				}
			}
			else if (!client.is_connected()) {
				cout << "Lost connection" << endl;
				while (!client.is_connected()) {
					this_thread::sleep_for(milliseconds(250));
				}
				cout << "Re-established connection" << endl;
			}

			// Put code here to handle "msgCommand" and control motor(s) and other things
		}

		// Disconnect
		cout << "\nDisconnecting from the MQTT server..." << flush;
		client.disconnect();
		cout << "OK" << endl;
	}
	catch (const mqtt::exception& exc) {
		cerr << exc.what() << endl;
		return 1;
	}

 	return 0;
}
4. Compile
This step can be a bit tricky if you're unfamiliar with C++ and external libraries (it was new for me, at least).
Assuming everything installed correctly in the previous step, in the location where your code is, use the following command to compile and link your program:
g++ -I/usr/local/include -I/usr/local/include/mqtt -L/usr/local/lib -lpaho-mqttpp3 -lpaho-mqtt3a -lwiringPi -o MyExecutable main.cpp motor_driver.cpp
Explanation:
-I/usr/local/include: Includes the Paho C library headers.-I/usr/local/include/mqtt: Includes the Paho MQTT C++ library headers.-L/usr/local/lib: Links the directory containing the shared libraries.-lpaho-mqttpp3: Links the Paho MQTT C++ library.-lpaho-mqtt3a: Links the Paho MQTT C library (use-lpaho-mqtt3asfor the secure version if needed).-lwiringPi: Links the WiringPi library.-o MyExecutable: Names your output executable.main.cpp motor_driver.cpp: The C++ source files you created/used from step 3.
Note: motor_driver.cpp contains the code to control the motors via the GPIO pins. If you need help setting this up, refer to the previous post for more details.
5. Run/Debug (common issues)
After compiling, run your executable with the following command:
./MyExecutable
Note: If you encounter shared library issues when compiling, refer to Step 5a for solutions.
5-a. Troubleshoot Shared Library Issues
If you encounter the below error, it means that the system’s dynamic linker can't find the necessary library:
error while loading shared libraries: libmylib.so: cannot open shared object file: No such file or directory.
Here are some ways to fix this:
Option 1: Set the LD_LIBRARY_PATH Environment Variable
This is a temporary fix. Set the LD_LIBRARY_PATH environment variable to include /usr/local/lib, where the libpaho-mqttpp3.so.1 library is installed before running your executable:
export LD_LIBRARY_PATH=/usr/local/lib:$LD_LIBRARY_PATH
./MyExecutable
Option 2: Add /usr/local/lib to the System-Wide Library Path
For a more permanent solution, add /usr/local/lib to the system’s library search path:
- Create a new configuration file for the dynamic linker:
echo "/usr/local/lib" | sudo tee /etc/ld.so.conf.d/paho-mqtt.conf
- Update the linker cache:
sudo ldconfig
- Now you can run your executable without setting
LD_LIBRARY_PATH:
./MyExecutable
Option 3: Use RPATH or RUNPATH in Your Executable
Embed the library search path directly into your executable using the -Wl,-rpath or -Wl,-rpath-link linker options during compilation:
g++ -I/usr/local/include -I/usr/local/include/mqtt -L/usr/local/lib -lpaho-mqttpp3 -lpaho-mqtt3a -lwiringPi -Wl,-rpath=/usr/local/lib -o MyExecutable main.cpp motor_driver.cpp
6. Write Code (JavaScript)
Send MQTT messages from your browser using JavaScript and the Eclipse Paho JavaScript MQTT client library. Below is a sample code you can use.
When the browser sends an MQTT message via the Eclipse Paho JavaScript client, it is published to a specific topic on the MQTT server. The Raspberry Pi subscribes to that topic, receives the message, and processes it to control the motors.
Here's a very basic example of where we send the message 'ON' to the topic motor/control. You can modify the code to send different commands (like 'OFF' or 'REVERSE') to control the motor's behaviour.
// Connecting to the MQTT broker over WebSockets
let client = new Paho.MQTT.Client("test.mosquitto.org", Number(8080), "<clientId>");

client.connect({
    onSuccess: onConnect
});

function onConnect() {
    console.log("Connected to the MQTT broker.");
    // Now you can publish messages or subscribe to topics
}

function sendMessage() {
    let message = new Paho.MQTT.Message("ON");
    message.destinationName = "motor/control";
    client.send(message);
}
6-a. Permission Issues
If you get some permission error, look into the Content-Security-Policy. Either add a meta-tag to the HTML or an HTTP response header from your web server.
Also, double-check that you are using the correct port for your call. For example, port 8080 is for MQTT over unencrypted, unauthenticated WebSockets, and port 8081 is for MQTT over encrypted, unauthenticated WebSockets.
7. Run Automatically on Startup
systemd is the service manager in most modern Linux distributions, including Raspbian (the Raspberry Pi OS). You can create a custom service for your C++ program to start it at boot.
Steps:
- Compile your C++ program:
g++ -I/usr/local/include -I/usr/local/include/mqtt -L/usr/local/lib -lpaho-mqttpp3 -lpaho-mqtt3a -lwiringPi -o MyExecutable main.cpp motor_driver.cpp
- Create a new service file:
sudo nano /etc/systemd/system/my_program.service
- Add the following content to the file:
[Unit]
Description=My C++ Program
After=network.target

[Service]
ExecStart=/path/to/your/program/my_program
Restart=always
User=pi

[Install]
WantedBy=multi-user.target
Replace /path/to/your/program/my_program with the full path to your compiled program. Make sure you provide the full path to the program.
- Save the file and exit.
- Enable the service to run at startup:
sudo systemctl enable my_program.service
- Start the service immediately (for testing):
sudo systemctl start my_program.service
- Check the status of your service to ensure it's running:
sudo systemctl status my_program.service
- Reboot to confirm it starts automatically:
sudo rebootMore information about the configuration file and available options can be found here.
8. Test Everything Together
Demo on ByteBuggy. Honking the horn, toggling the light, driving and eventually shutting down the program.
Congratulations! You’ve successfully set up a system to control your motors via a web browser using MQTT and WebSockets.
To further improve your setup, you could add a sensor to get feedback from the motors and display the data in real-time on your web browser. You could also secure your MQTT communication by using SSL/TLS encryption.
Sample Code
You can find the complete code on GitHub.