SPI Example with Arduino Uno and MKR WiFi 1010
An example of communicating between an Arduino Uno and an Arduino MKR WiFi 1010 using the SPI protocol.

In this article, we'll review an example of communicating between an Arduino Uno and an Arduino MKR WiFi 1010 using the SPI protocol.
We'll create some values on the MRK side and send them to the Uno. Once the Uno receives the values, it will print them out on the Serial Monitor.
Required Components
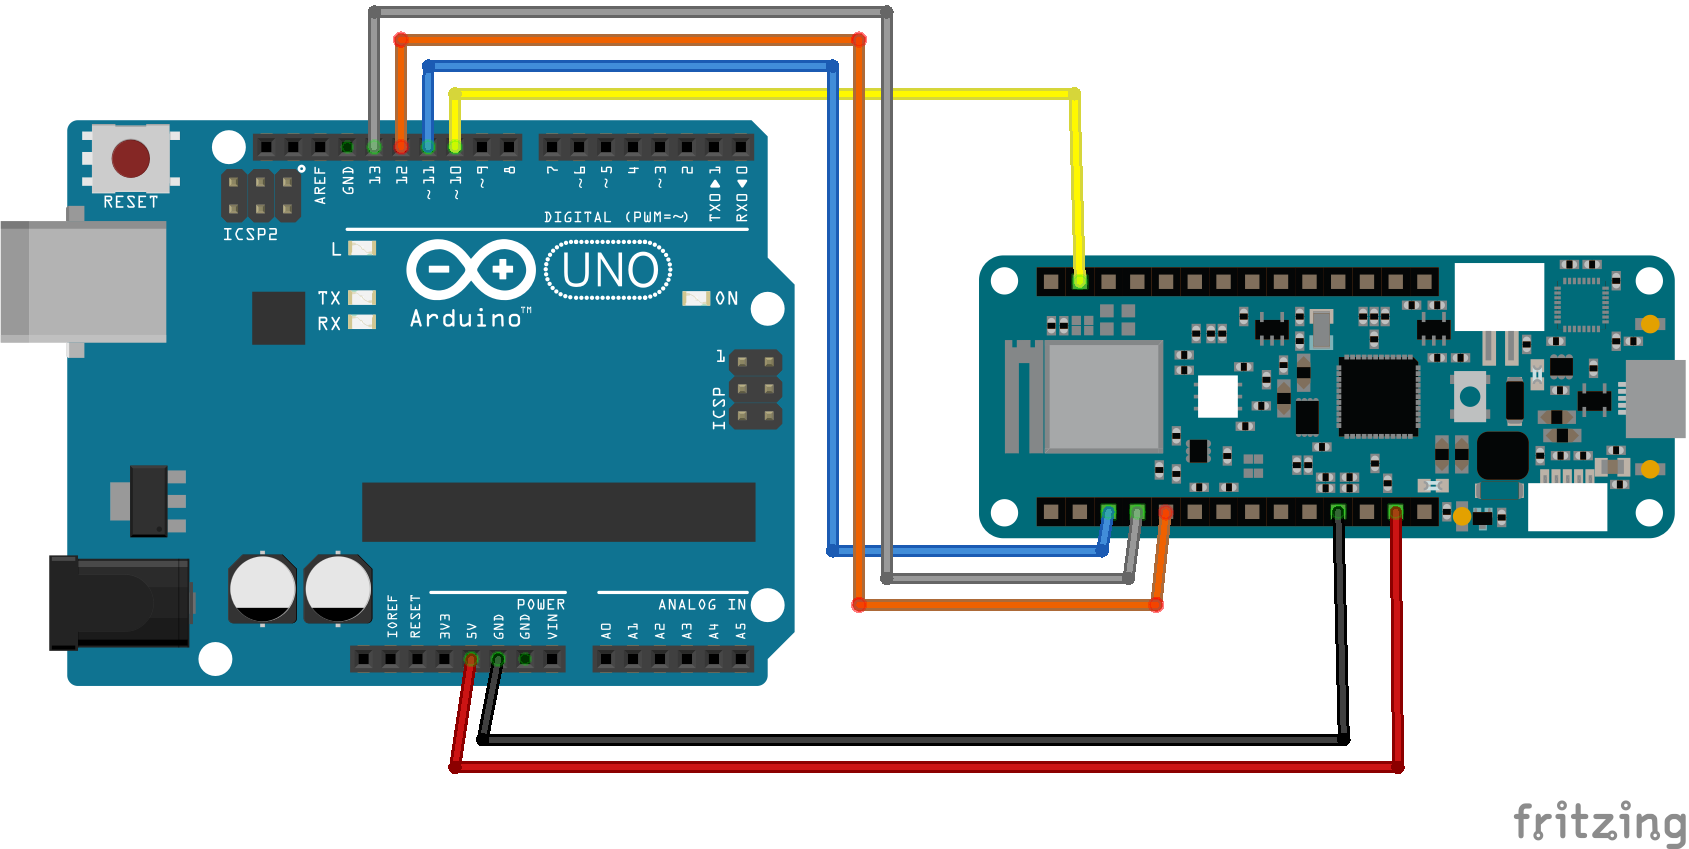
Circuit Diagram

Code (MKR WiFi 1010 - controller)
Click to see some code.
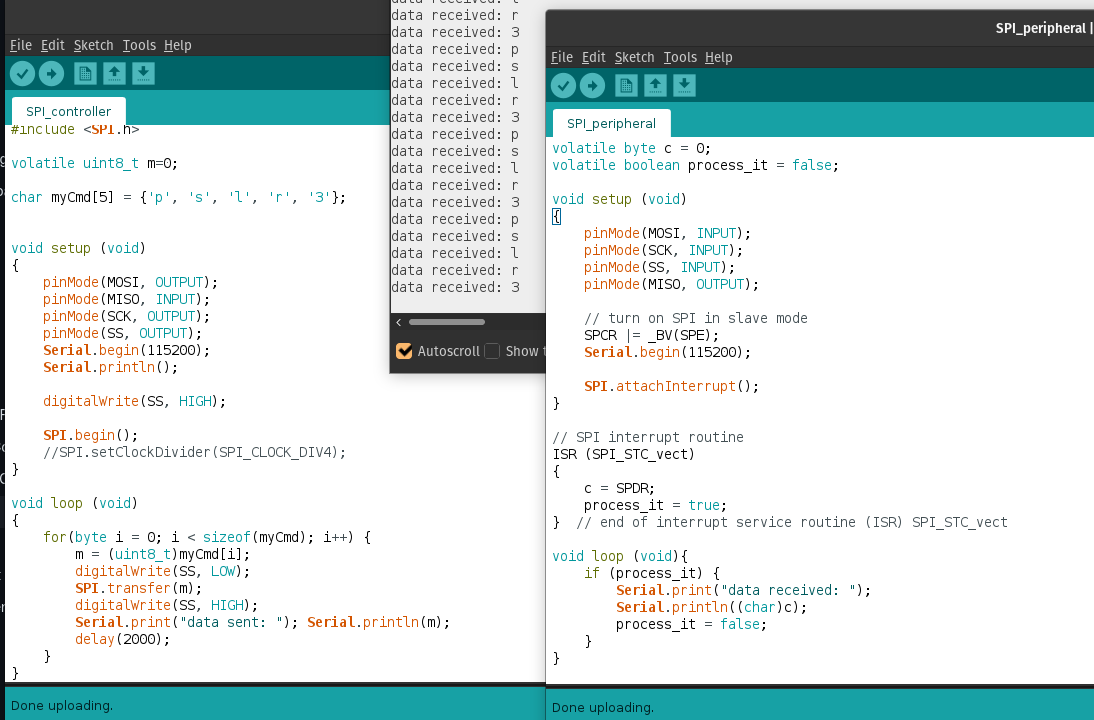
#includevolatile uint8_t m=0; char myCmd[5] = {'p', 's', 'l', 'r', '3'}; void setup (void) { pinMode(MOSI, OUTPUT); pinMode(MISO, INPUT); pinMode(SCK, OUTPUT); pinMode(SS, OUTPUT); Serial.begin(115200); Serial.println(); digitalWrite(SS, HIGH); SPI.begin(); } void loop (void) { for(byte i = 0; i < sizeof(myCmd); i++) { m = (uint8_t)myCmd[i]; digitalWrite(SS, LOW); SPI.transfer(m); digitalWrite(SS, HIGH); Serial.print("data sent: "); Serial.println(m); delay(2000); } }
Code (Uno - peripheral)
Click to see some code.
#includevolatile byte c = 0; volatile boolean process_it = false; void setup (void) { pinMode(MOSI, INPUT); pinMode(SCK, INPUT); pinMode(SS, INPUT); pinMode(MISO, OUTPUT); // turn on SPI in peripheral mode SPCR |= _BV(SPE); Serial.begin(115200); SPI.attachInterrupt(); } // SPI interrupt routine ISR (SPI_STC_vect) { c = SPDR; process_it = true; } // end of interrupt service routine (ISR) SPI_STC_vect void loop (void){ if (process_it) { Serial.print("data received: "); Serial.println((char)c); process_it = false; } }
Wiring
The computer powers the Arduino Uno via USB, and the MKR is powered by 5V from the Uno.
| Arduino Uno | Arduino MKR WiFi 1010 | Description |
|---|---|---|
| 5V | Vin | - |
| GND | GND | - |
| 10 | 4 | CS |
| 11 | 8 | COPI (MOSI) |
| 12 | 10 | CIPO (MISO) |
| 13 | 9 | SCK |
Results
Once everything is connected, you should see some values displayed in the Serial Monitor from the Uno.

Well done!
Thank you for reading.


